> ## Documentation Index
> Fetch the complete documentation index at: https://developers.qomon.com/llms.txt
> Use this file to discover all available pages before exploring further.
# Getting started
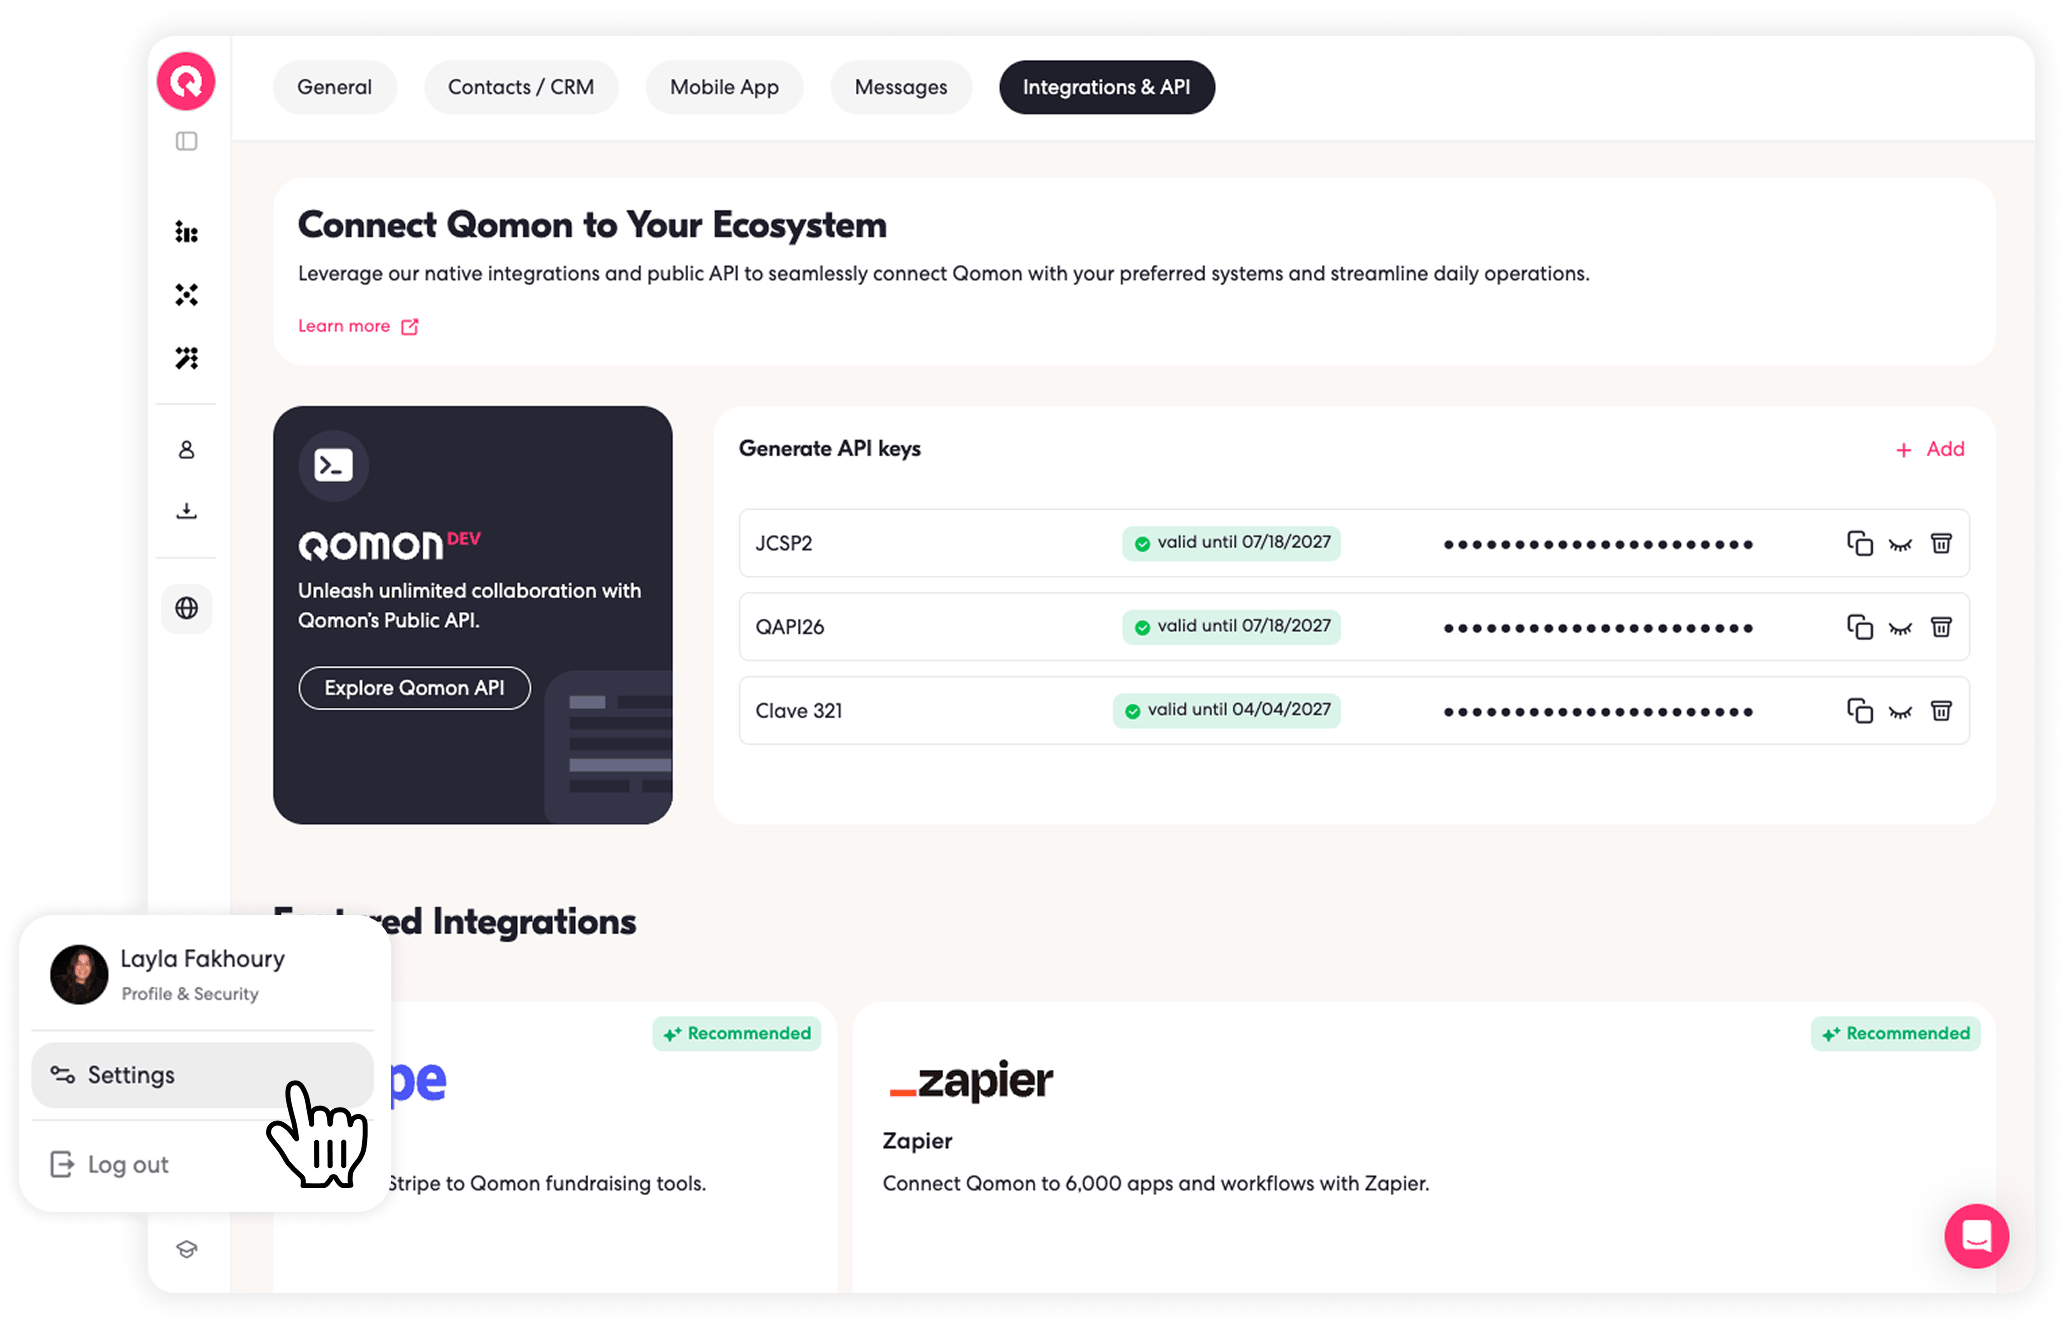
## Your API keys
Your API key authenticates requests to the Qomon Public API. Treat it like a password and keep it private.
### Find your API keys
You can also open the [API keys page](https://qomon.app/settings/extensions/connect) directly.
 ## Choose your API domain
Use `https://incoming.qomon.app` for API requests by default.
Only use `https://incoming-us.qomon.app` when your space's API settings explicitly mention the `incoming-us` subdomain.
When following examples in these docs, replace only the host if your space uses the US domain. Keep the same endpoint path.
## Authentication
Send your API key in the `Authorization` header on every request. You can regenerate or delete keys when you need to rotate access. For security measures, keys can be regenerated or deleted as needed.
### Request headers
Use the bearer token format:
`Authorization: Bearer 7ZOrUe4ZTmy-Rzjn-CjJ1Q`
## Rate limits
Read the [rate limits](/pages/v1/rate-limits) page before you build imports, synchronization jobs, or other write-heavy integrations.
## Choose your API domain
Use `https://incoming.qomon.app` for API requests by default.
Only use `https://incoming-us.qomon.app` when your space's API settings explicitly mention the `incoming-us` subdomain.
When following examples in these docs, replace only the host if your space uses the US domain. Keep the same endpoint path.
## Authentication
Send your API key in the `Authorization` header on every request. You can regenerate or delete keys when you need to rotate access. For security measures, keys can be regenerated or deleted as needed.
### Request headers
Use the bearer token format:
`Authorization: Bearer 7ZOrUe4ZTmy-Rzjn-CjJ1Q`
## Rate limits
Read the [rate limits](/pages/v1/rate-limits) page before you build imports, synchronization jobs, or other write-heavy integrations.